toe kick flooring · 8 min read
Cabinet Toe Kick Flooring: Materials, Installation Tips and What You Need to Know
By Dean Marchetti · Published 5 November 2026
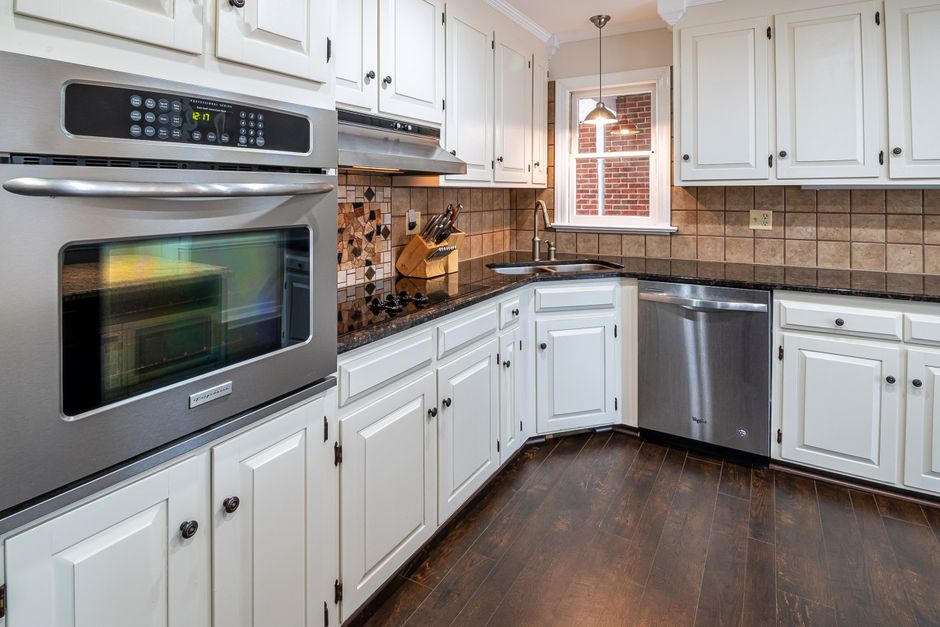
Whether you are installing new kitchen cabinets or renovating an existing space, understanding how flooring interacts with your cabinetry can save you time, money and a lot of frustration down the track. This article walks through everything you need to know about cabinet toe kick flooring, from the basics right through to material choices and installation tips.
What Is Cabinet Toe Kick Flooring
The toe kick is the recessed panel running along the base of your kitchen or bathroom cabinets, sitting between the cabinet base and the floor. It is designed to give your feet clearance when you stand close to the bench, making everyday tasks far more comfortable. Cabinetry in residential and commercial settings almost always includes this feature, yet the flooring beneath and around it is frequently overlooked during planning.
Cabinet toe kick flooring refers to the floor surface that sits directly under and in front of that recessed kickboard area. This includes the flooring that runs underneath the cabinet base itself, as well as the visible strip of floor in front of the toe kick. Getting this detail right matters for several practical reasons:
- Moisture protection: Gaps between the toe kick and the floor can allow water, food debris and grime to accumulate, leading to damage over time.
- Structural support: Cabinets installed on an uneven or poorly finished floor surface can rock, warp or settle incorrectly.
- Visual finish: A seamless, well-fitted floor beneath the toe kick gives the entire kitchen or bathroom a polished, professional appearance.
- Hygiene: Closed, smooth flooring in this area is far easier to clean and far less likely to harbour bacteria or pests.
In Sydney homes especially, where kitchens and bathrooms are often laid on concrete slabs, the type of flooring material chosen for the toe kick zone has a direct impact on longevity and maintenance. Choosing the right surface from the start avoids costly repairs later.
Common Materials Used for Cabinet Toe Kick Flooring
The gap beneath kitchen and bathroom cabinets creates a unique flooring challenge. The material you choose for this recessed zone needs to handle foot traffic, moisture, cleaning products and the occasional dropped utensil, all within a narrow space that is tricky to access once cabinets are installed. Here are the most common options you will encounter:
- Vinyl and luxury vinyl plank (LVP): A popular choice for toe kick areas because it is flexible, moisture-resistant and easy to cut into narrow strips. It handles kitchen spills well and comes in a wide range of finishes to match the main floor.
- Tile and porcelain: Extremely durable and waterproof, tile is a solid performer in wet areas like kitchens and bathrooms. The main drawback is the grout lines, which can collect grime right where foot traffic is heaviest.
- Hardwood and engineered timber: These add warmth and continuity when the main floor is timber, but they require careful sealing at the toe kick zone to prevent moisture damage over time.
- Epoxy coatings: This is where things get interesting for homeowners who want a seamless, low-maintenance finish. A thin epoxy coating applied across the full floor, including beneath cabinet overhangs, creates a continuous surface with no grout lines or seams to trap bacteria or moisture. For Sydney homes with concrete subfloors, a properly diamond-ground and epoxy-coated surface extends cleanly into toe kick recesses, making the entire floor far easier to wipe down.
- Sheet vinyl: Budget-friendly and simple to install in awkward spots, though it can lift at edges over time if adhesive is not applied thoroughly.
Each material has trade-offs around cost, durability and ease of installation in tight spaces. For high-traffic kitchens or laundries where hygiene and longevity matter most, a seamless epoxy or polyaspartic coating consistently outperforms options that rely on grout or mechanical joins at floor level.
How to Measure and Cut Toe Kick Flooring
Getting accurate measurements before you cut a single piece of material is the step that separates a clean, professional result from a frustrating do-over. Cabinet toe kick recesses are rarely perfectly uniform, so treat each section as its own individual measurement rather than assuming they all share the same dimensions.
- Measure height and depth separately for every run. Standard toe kick openings sit around 90–100 mm tall and 70–90 mm deep, but older kitchens and laundries in Sydney homes often vary by 10 mm or more from one cabinet to the next.
- Use a contour gauge or cardboard template for irregular edges. Where the toe kick meets an existing floor coating, any slight lip or variation needs to be scribed into your cut piece so it sits flush.
- Add 5–10 mm to your length measurements. Cutting slightly long and trimming back gives you far more control than trying to fill a gap caused by a short cut.
- Mark your cut lines clearly on the face side. Score laminate and rigid core vinyl from the top face down to avoid chipping; cut timber-based materials with a fine-tooth saw blade.
- Check for square at every corner. Use a small speed square, because even a 2-degree angle error becomes visible over a long run.
One thing worth considering: if the floor running out from under the cabinet is a high-performance coating, the toe kick material should complement it visually and sit at the right reveal height. Many Sydney homeowners finishing a renovation discover the existing garage floor epoxy coating or kitchen floor treatment influences which toe kick finish reads best. If you are still choosing your overall floor system, browsing the Coating Systems page can help you match finishes before you lock in your material selection.
Installation Tips for a Clean Finished Look
Getting the toe kick area right comes down to preparation and sequencing. Whether you are installing timber, vinyl plank or an epoxy-coated finish beneath your cabinets, a few careful steps will separate a polished result from one that looks rushed.
- Start with a flat, clean substrate. Any debris, adhesive residue or uneven concrete beneath the cabinet line will telegraph through your finished flooring. Grind back high spots and fill low areas before you bring any material into the toe kick recess.
- Measure the recess depth carefully. Toe kick recesses are typically 70–100 mm deep and around 100 mm high. Account for the full flooring thickness, including any underlay, so the finished surface sits flush with the main floor run.
- Run the flooring material in first, cabinets second where possible. On new builds or full kitchen renovations, running your flooring continuously under the cabinet kickboard line before the cabinets are set gives the cleanest result. It eliminates visible cut edges and reduces the risk of moisture ingress at the join.
- Use a sharp pull saw or oscillating tool for tight cuts. Scribing to walls and cutting around existing cabinet bases requires precision. A clean cut edge means less filler and a more professional finish.
- Seal all exposed edges. Any cut edge of timber or vinyl that sits inside the toe kick zone should be sealed to prevent moisture from wicking up from the slab. This is especially important in kitchens and laundries where humidity is higher.
- Reattach the kickboard with clips, not nails. Clip systems allow easy access for future plumbing or repairs without damaging your floor surface.
Taking time at each of these steps means your toe kick flooring will look intentional and integrated, rather than an afterthought tucked out of sight.
Matching Toe Kick Flooring to Your Kitchen Design
Choosing the right toe kick flooring is not just a practical decision. It is a design decision that can quietly elevate the entire look of your kitchen. The goal is to create a seamless visual flow from the main floor surface right through to the base of your cabinetry, so the eye moves naturally around the space without awkward interruptions.
Here are some key principles to keep in mind when matching toe kick flooring to your kitchen style:
- Continuity first: Where possible, run the same flooring material into the toe kick recess. This approach works exceptionally well with polished concrete, epoxy coatings and polyaspartic finishes, all of which can be applied as a single continuous surface with no joins or transitions.
- Colour coordination: If you cannot match the material exactly, choose a tone that complements rather than contrasts. A warm-toned timber-look floor pairs naturally with a similarly warm grout or painted toe kick finish.
- Finish consistency: A high-gloss kitchen floor looks best paired with a toe kick area that shares a similar sheen level. Matte beside gloss creates a visual inconsistency that feels unfinished.
- Dark versus light cabinetry: Darker cabinets benefit from a slightly lighter toe kick floor treatment to prevent the base of the kitchen from feeling visually heavy. Lighter cabinetry is more forgiving across a broader range of floor tones.
For Sydney kitchens where polished concrete or an epoxy coating system already covers the main floor area, extending that same coating into the toe kick recess is both the simplest and most durable solution. The result is a hygienic, seamless finish with no grout lines or edges for moisture to penetrate.
Getting the toe kick flooring right ties together every element discussed in this article. From understanding what the toe kick actually is, to choosing durable materials, preparing the surface correctly and fitting everything neatly, each step builds toward a kitchen base that is tough, easy to clean and genuinely polished in appearance. Take the time to plan this detail properly and it will reward you every single day.

Dean Marchetti
Founder & Managing Director at Ironclad Floor Solutions. About the author